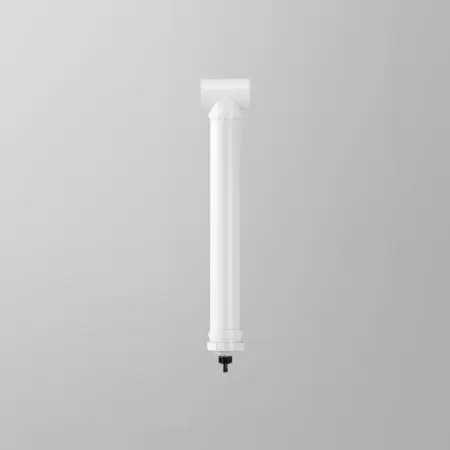

Blue Mountain First Flush Diverter w/ BasicTee
Rainwater Downpipe First Flush Diverters 80/100mm
$84.95 excl. GST
- Diverts first, dirtiest runoff—dust, pollen, ash, droppings, fine sediments—before tank.
- Set-and-forget ball-and-seat seals when the chamber fills; cleaner water bypasses automatically.
- Self-draining valve empties after rain, resetting for the next shower.
- Size to roof area: 0.5–2.0 L/m²; ~5.7 L per metre of 90 mm, ~8.8 L per metre of 100 mm pipe.
- UV-resistant PVC; fits 90 mm or 100mm downpipes commonly found in NZ.
- Simple solvent-weld install; quick bottom-cap cleaning and maintenance.
Get cleaner tank water from the very first drop. The Blue Mountain First Flush Diverter Basic Tee is a low-cost upgrade that helps protect pumps, filters, and appliances—and installs in minutes. Order from Aqua Works Warkworth with click & collect or NZ-wide shipping.
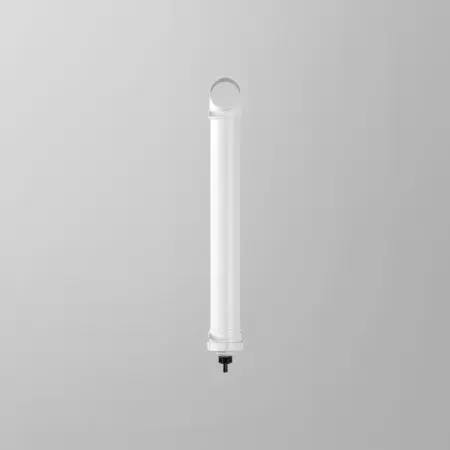
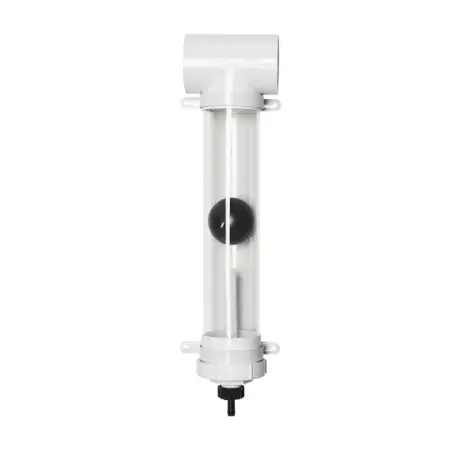
Complete First-Flush Diverter Basic Tee Setup: Rain Head, Screen & Smart Sizing
Pair it with a leaf-eater rain head and a tank inlet screen for a complete, cleaner-water setup. Fit one diverter on each down pipe feeding the tank, or split the total first-flush volume across multiple chambers—even on charged (“wet”) lines—so long as the tee is upstream of the tank. The kit supplies the tee and internals; you provide the straight PVC chamber pipe to suit your roof. After dry spells or heavy winds, quickly rinse the drain screen/washer—Aqua Works can help size and configure your system. Call us on 0800 278 288 to make an informed purchasing decisions.
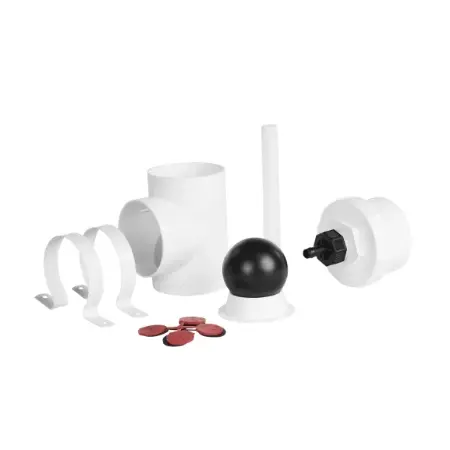
What’s in the kit
Basic Tee body with ball seat & float ball, bottom screw cap with hose connector, small filter screen, flow-control washers (to tune drain speed), and two wall brackets. (You add the length of 90/100 mm PVC for the chamber.)
How it works
At the start of rain, the chamber fills with the “first flush.” As the ball rises, it seals the inlet, allowing cleaner water to bypass your tank. After the rain, the slow-release valve empties the chamber, allowing the diverter to reset automatically.
Helpful FAQs
Do I need one per downpipe?
Yes—fit a diverter on each downpipe feeding the tank, or size one shared diverter correctly if you’re using a combined line.
How big should the first-flush chamber be?
Use 0.5–2.0 L per m² of roof area; increase the volume if your roof collects more debris (trees, birds, urban dust).
Basic Tee vs Catch-All Tee?
Basic Tee is the cost-effective standard diverter. Catch-All Tee improves capture during intense downpours; consider it if your site gets frequent cloudbursts or very short downpipes.
Specifications
- Brand Name: Rain Harvesting by Blue Mountain Co.
- Downpipe sizes: 90 mm or 100 mm
- Material: UV-resistant PVC
- Placement: vertical on a downpipe or charged line, upstream of the tank
- Clearance: keep the drain outlet ≥150 mm above ground
- Best for: potable systems (with appropriate treatment), household use, irrigation, sheds, lifestyle blocks, and small commercial tanks
Sizing made simple (rules of thumb)
- Low-pollution roofs: ~0.5 L/m² of roof area
- Higher-pollution roofs (trees, birds, busy roads): ~2.0 L/m²
- Example: 140 m² roof × 1 L/m² ≈ 140 L first-flush volume → ~24 m of 90 mm pipe or ~16 m of 100 mm (split across downpipes if preferred)
Install & maintenance notes for First Flush Diverter Basic Tee
- Cut the tee into your downpipe; solvent-weld joins. 2.
- Add a vertical chamber of your chosen length and secure it with brackets.
- Fit the drain hose; select a flow washer to set the emptying speed.
- Quarterly: remove the bottom cap, rinse the screen, and check the washer.
Download Documents
Installation Instructions